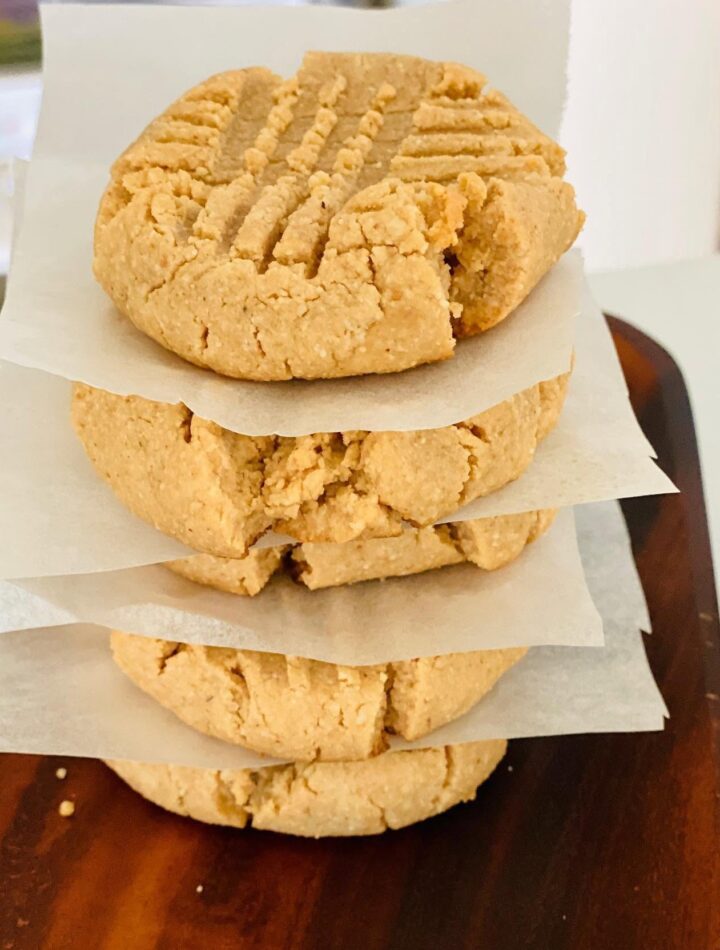
There is something incredibly comforting about the aroma of freshly baked peanut butter cookies filling the kitchen. Their rich nutty flavor, soft centers, lightly crisp edges, and signature crisscross pattern make them one of the most loved homemade cookies. This Gluten-Free Peanut Butter Cookie recipe delivers everything you expect from a classic peanut butter cookie while using a dependable gluten-free flour blend that creates delicious results without compromising taste or texture.
Whether you follow a gluten-free lifestyle because of dietary needs or simply enjoy trying different baking recipes, these cookies are an excellent addition to your collection. They are simple enough for beginners yet delicious enough to impress family and friends. The dough comes together in just a few minutes with everyday pantry ingredients, requires only a short chilling time, and bakes quickly, making these cookies perfect for busy weekdays, holiday baking, school lunches, bake sales, or afternoon snacks.
The combination of creamy peanut butter, butter, brown sugar, and vanilla creates a rich, bakery-style flavor, while the gluten-free flour blend provides structure without making the cookies dry or crumbly. Every bite is soft, chewy, and packed with roasted peanut flavor that both children and adults will enjoy.
Why You’ll Love This Recipe
- Soft, chewy centers with lightly crisp edges
- Rich homemade peanut butter flavor
- Easy to prepare using simple pantry ingredients
- Perfect for beginner gluten-free bakers
- Naturally freezer-friendly
- Great for holidays, lunchboxes, parties, and bake sales
- Ready in less than one hour
- Easy to customize with chocolate chips or chopped peanuts
- Beautiful classic crisscross cookie design
- Delicious with coffee, tea, or a cold glass of milk
Preparation Time
- Preparation Time: 15 minutes
- Chilling Time: 20 minutes
- Baking Time: 10–12 minutes
- Cooling Time: 5 minutes
- Total Time: Approximately 50 minutes
- Servings: 18 cookies
Ingredients
For the Cookie Dough
- 1 cup creamy peanut butter
- ½ cup unsalted butter, softened
- ¾ cup brown sugar
- ¼ cup granulated sugar
- 1 large egg
- 1 teaspoon vanilla extract
- 1½ cups gluten-free all-purpose flour (with xanthan gum if possible)
- ½ teaspoon baking soda
- ¼ teaspoon baking powder
- ¼ teaspoon salt
Optional Toppings
- Extra granulated sugar for rolling
- Flaky sea salt
- Mini chocolate chips
- Chopped roasted peanuts
Equipment Needed
- Large mixing bowl
- Medium mixing bowl
- Electric mixer or hand mixer
- Measuring cups and spoons
- Rubber spatula
- Cookie scoop or tablespoon
- Fork
- Baking sheets
- Parchment paper
- Cooling rack
Instructions
Step 1: Prepare the Oven
Preheat your oven to 350°F (175°C).
Line two baking sheets with parchment paper or silicone baking mats. This helps prevent sticking and encourages even baking.
Set the prepared baking sheets aside while making the cookie dough.
Step 2: Cream the Butter and Sugars
Place the softened butter into a large mixing bowl.
Add the brown sugar and granulated sugar.
Using an electric mixer, beat on medium speed for about 3 to 4 minutes until the mixture becomes pale, creamy, and fluffy.
Creaming properly introduces air into the dough, helping create soft cookies with a tender texture.
Step 3: Add the Peanut Butter
Add the creamy peanut butter to the butter mixture.
Continue mixing until everything is completely blended.
The mixture should become smooth, thick, and creamy without any visible streaks of butter.
Traditional creamy peanut butter generally provides the most reliable results because it creates a consistent dough.
Step 4: Mix in the Egg and Vanilla
Crack the egg into the bowl.
Add the vanilla extract.
Beat until the mixture is completely smooth and fully combined.
Room-temperature eggs mix more evenly and create a smoother cookie dough.
Step 5: Combine the Dry Ingredients
In a separate bowl, whisk together:
- Gluten-free flour
- Baking soda
- Baking powder
- Salt
Whisking distributes the leavening ingredients evenly throughout the flour.
This helps every cookie bake consistently.
Step 6: Prepare the Dough
Gradually add the dry ingredients to the peanut butter mixture.
Mix on low speed just until the flour disappears.
Do not overmix.
The finished dough should be soft, smooth, and slightly thick.
If using mini chocolate chips or chopped roasted peanuts, gently fold them into the dough with a spatula.
Step 7: Chill the Dough
Cover the bowl with plastic wrap or a lid.
Refrigerate for 20 minutes.
Chilling allows the butter to firm slightly while giving the gluten-free flour time to absorb moisture.
This simple step helps prevent excessive spreading and creates thicker, softer cookies.
Step 8: Shape the Cookies
Using a cookie scoop or about 2 tablespoons of dough, roll each portion into a smooth ball.
If desired, roll each dough ball lightly in granulated sugar.
Arrange the dough balls on the prepared baking sheets, leaving about 2 inches of space between each cookie.
Step 9: Create the Classic Crisscross Pattern
Using a fork, gently press each dough ball once.
Rotate the fork 90 degrees and press again.
This creates the traditional crisscross pattern associated with classic peanut butter cookies.
Avoid pressing too firmly, as the cookies should remain slightly thick.
If desired, sprinkle the tops with flaky sea salt, chocolate chips, or chopped peanuts.
Step 10: Bake
Bake the cookies for 10 to 12 minutes.
The edges should become lightly golden while the centers remain slightly soft.
Avoid overbaking.
The cookies will continue to set as they cool.
Step 11: Cool the Cookies
Remove the baking sheets from the oven.
Allow the cookies to remain on the baking sheets for about 5 minutes.
This resting period allows the centers to finish setting without becoming dry.
Transfer the cookies carefully to a wire rack and cool completely.
Serving Suggestions
These cookies are delicious served:
- With cold milk
- Alongside coffee
- With hot tea
- With hot chocolate
- As part of a holiday dessert platter
- In lunchboxes
- At birthday parties
- With vanilla ice cream
- As ice cream sandwiches
- With fresh fruit for a balanced dessert plate
Storage Instructions
Once completely cooled, store the cookies in an airtight container.
They remain fresh at room temperature for up to 5 days.
For longer storage, refrigerate them for up to 10 days.
Place parchment paper between layers to help preserve their appearance.
Freezing Instructions
Freeze the Dough
Shape the dough into balls.
Arrange them on a baking sheet and freeze until firm.
Transfer the frozen dough balls into freezer-safe containers or bags.
Freeze for up to 3 months.
Bake directly from frozen, adding an extra 1 to 2 minutes to the baking time.
Freeze Baked Cookies
Allow the baked cookies to cool completely.
Store them in freezer-safe containers with parchment paper between layers.
Freeze for up to 3 months.
Thaw at room temperature before serving.
Tips for Perfect Cookies
- Use room-temperature butter and eggs.
- Measure gluten-free flour carefully.
- Choose a quality gluten-free flour blend containing xanthan gum.
- Stir natural peanut butter thoroughly before measuring if using it.
- Chill the dough before baking.
- Avoid overmixing once the flour is added.
- Bake until only the edges are lightly golden.
- Let the cookies cool on the baking sheet before moving them.
- Store in an airtight container to maintain freshness.
- Add flaky sea salt for extra flavor contrast.
Delicious Variations
1. Chocolate Chip Peanut Butter Cookies
Fold ½ cup of mini chocolate chips into the dough before chilling for a classic chocolate and peanut butter combination.
2. Double Peanut Cookies
Mix chopped roasted peanuts into the dough and sprinkle more on top before baking for extra crunch and peanut flavor.
3. Peanut Butter and Jam Cookies
After baking and cooling, add a small spoonful of strawberry, raspberry, or grape jam to the center of each cookie for a nostalgic twist.
4. Salted Peanut Butter Cookies
Sprinkle flaky sea salt over the warm cookies immediately after baking to create a sweet-and-salty flavor combination.
5. Cinnamon Peanut Butter Cookies
Add ½ teaspoon of ground cinnamon to the dry ingredients for a warm, aromatic flavor.
6. Chocolate Drizzle Cookies
Once cooled, drizzle melted dark or white chocolate over the cookies for an elegant finish.
Frequently Asked Questions
1. Can I use natural peanut butter?
Yes. Stir it thoroughly until the oil is fully incorporated before measuring. This helps maintain a consistent dough and prevents excessive spreading.
2. Why do I need to chill the dough?
Chilling firms the butter, hydrates the gluten-free flour, and helps the cookies hold their shape while baking.
3. How do I know when the cookies are done?
The edges should be lightly golden while the centers still look slightly soft. They will continue to set as they cool.
4. Can I make the dough ahead of time?
Yes. The dough can be refrigerated for up to 24 hours before baking or frozen for up to 3 months.
5. Why are my cookies dry?
Dry cookies are usually caused by adding too much flour or baking them for too long. Measure carefully and remove them from the oven while the centers are still soft.