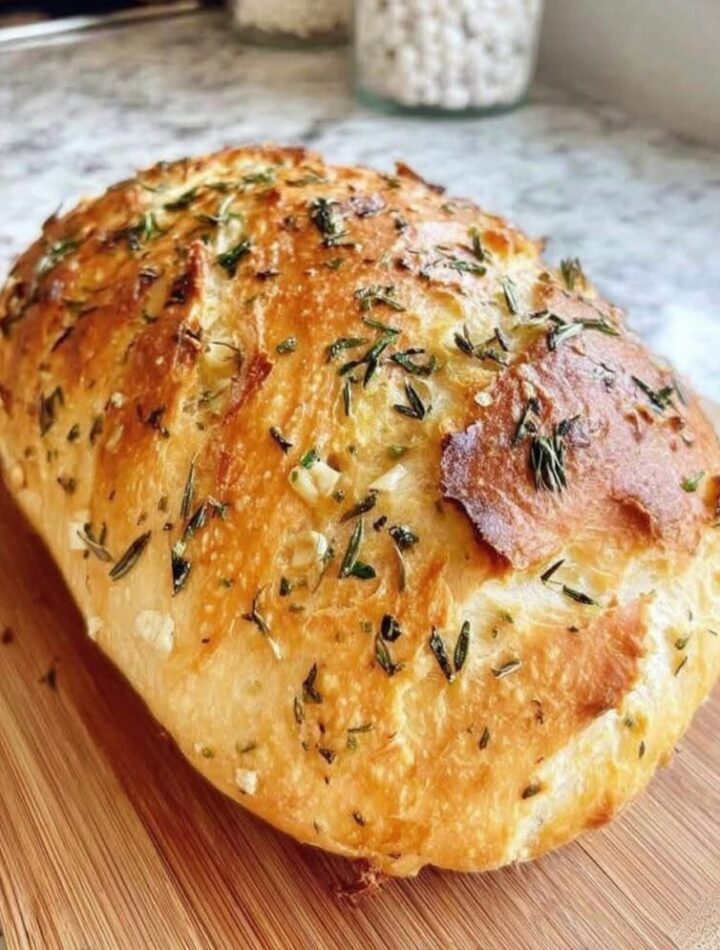
Making homemade bread without gluten can seem challenging, but this No-Knead Gluten-Free Bread recipe makes the process simple, reliable, and enjoyable. Unlike traditional wheat bread, which depends on gluten to create stretch and structure, gluten-free bread uses a special combination of flours, starches, and binding ingredients to create a soft, stable, and delicious loaf.
This recipe is designed for anyone who wants fresh homemade bread without kneading, complicated techniques, or hard-to-find equipment. The dough comes together easily, rests while the ingredients develop their texture, and bakes into a golden loaf with a tender crumb.
Traditional bread relies on kneading to develop gluten networks that trap air and create elasticity. Since gluten-free ingredients do not contain these proteins, this recipe uses a different approach. The structure comes from hydration, psyllium husk, starches, and careful baking.
The result is a loaf that is:
- Soft and moist inside
- Light but sturdy enough for slicing
- Naturally gluten-free
- Perfect for toast and sandwiches
- Easy enough for beginner bakers
This bread is proof that gluten-free baking can produce satisfying results with the right balance of ingredients and technique.
Why You Will Love This Gluten-Free Bread
There are many reasons this recipe is a favorite among home bakers:
- No kneading required
You do not need special bread-making skills or hours of dough preparation. - Simple ingredients
Most ingredients are easy to find in grocery stores or online. - Soft texture
The combination of starches and psyllium helps create a bread-like crumb. - Versatile use
Enjoy it for breakfast, lunch, snacks, or dinner. - Freezer friendly
The loaf stores well and can be sliced ahead for convenience.
Understanding Gluten-Free Bread Structure
Gluten gives wheat bread its famous elasticity. When gluten is removed, another structure must be created.
This recipe uses:
- Rice flour for the main flour base
- Tapioca starch for flexibility
- Potato starch for softness
- Psyllium husk for binding
- Yeast for natural rise
Together, these ingredients create a dough system that behaves differently from traditional bread dough but still produces a satisfying loaf.
Ingredients
Dry Ingredients
1. Rice Flour – 1 cup
Rice flour provides the foundation of the bread.
It creates:
- Light texture
- Mild flavor
- Stable crumb structure
2. Tapioca Starch – ½ cup
Tapioca starch helps improve texture.
It adds:
- Softness
- Slight elasticity
- Better chew
3. Potato Starch – ½ cup
Potato starch helps retain moisture.
It provides:
- Tender crumb
- Light texture
- Freshness for longer
4. Psyllium Husk Powder – 1½ tablespoons
Psyllium is one of the most important ingredients.
It creates:
- A gel-like structure
- Better dough stability
- Improved slicing ability
5. Salt – 1 teaspoon
Salt enhances flavor and balances the bread.
Wet Ingredients
6. Warm Water or Milk – 1 to 1¼ cups
Liquid activates the ingredients and allows the starches to absorb moisture.
Warm liquid helps:
- Activate yeast
- Improve dough development
- Create better texture
7. Active Dry Yeast – 1 teaspoon
Yeast creates air bubbles that help the bread rise.
8. Sugar – 1 teaspoon
Sugar helps activate the yeast and adds mild sweetness.
9. Eggs – 2 large eggs (optional)
Eggs improve:
- Structure
- Moisture
- Richness
- Crust color
10. Olive Oil or Melted Butter – 1 tablespoon
Fat helps create:
- Softer texture
- Better flavor
- Moist crumb
Equipment Needed
- Large mixing bowl
- Measuring cups and spoons
- Whisk or wooden spoon
- Loaf pan
- Spatula
- Kitchen towel
- Oven
Step-by-Step Instructions
Step 1: Prepare the Dry Ingredients
In a large mixing bowl, combine:
- Rice flour
- Tapioca starch
- Potato starch
- Psyllium husk powder
- Salt
Mix thoroughly until all ingredients are evenly distributed.
This step is important because psyllium needs to spread throughout the flour mixture to create an even structure.
Step 2: Activate the Yeast
In a separate bowl, combine:
- Warm water
- Sugar
- Yeast
Stir gently and allow it to rest for 5 to 10 minutes.
The mixture should become slightly foamy.
This shows that the yeast is active and ready to help the bread rise.
Step 3: Combine Wet and Dry Ingredients
Add the yeast mixture to the dry ingredients.
Add:
- Eggs
- Olive oil or melted butter
Mix everything together until a thick, sticky dough forms.
Gluten-free dough is usually softer and wetter than wheat dough. It should not be kneaded like traditional bread.
Step 4: Rest the Dough
Cover the bowl with a clean towel.
Allow the dough to rest for 1 to 2 hours.
During this resting period:
- Psyllium absorbs water
- The dough becomes thicker
- Yeast produces air bubbles
- Flavor develops
This resting stage replaces traditional kneading.
Step 5: Prepare the Loaf Pan
Lightly grease a loaf pan with oil or butter.
Transfer the dough into the pan.
Use a wet spatula to smooth the top.
Because gluten-free dough is sticky, wet hands or utensils make shaping easier.
Step 6: Final Proofing
Cover the loaf pan and allow the dough to rest for another 20 to 30 minutes.
The dough should slightly increase in volume.
Avoid over-proofing because gluten-free bread can lose structure if it rises too much.
Step 7: Bake the Bread
Preheat the oven to:
180°C (350°F)
Bake for:
45 to 55 minutes
The bread is ready when:
- The top is golden brown
- The loaf feels firm
- The inside is fully cooked
You can tap the bottom gently; it should sound slightly hollow.
Step 8: Cool Completely
Remove the bread from the pan.
Allow it to cool for at least 1 hour before slicing.
Cooling is very important because the inside continues setting after baking.
Cutting too early may create a gummy texture.
Texture and Flavor Profile
A successful gluten-free bread should have:
Texture
- Soft interior
- Slightly springy crumb
- Stable slices
- Moist but not gummy
Flavor
- Mild grain flavor
- Gentle sweetness
- Light buttery aroma
- Neutral taste suitable for many toppings
Serving Ideas
Enjoy this bread with:
- Butter and jam
- Honey drizzle
- Avocado topping
- Eggs for breakfast
- Sandwich fillings
- Soups and stews
- Toasted slices with olive oil
It works well for both sweet and savory meals.
Delicious Variations
1. Herb Gluten-Free Bread
Add:
- Rosemary
- Thyme
- Basil
Perfect with soups and pasta dishes.
2. Garlic Bread Version
Add:
- Garlic powder
- Extra butter
- Parsley
Creates a flavorful dinner bread.
3. Seeded Bread
Mix in:
- Chia seeds
- Flax seeds
- Sunflower seeds
Adds crunch and extra texture.
4. Sweet Breakfast Bread
Add:
- Honey
- Cinnamon
- Raisins
Great for morning toast.
Common Mistakes and Solutions
Bread Is Too Gummy
Possible causes:
- Too much liquid
- Bread sliced too early
- Underbaking
Solution:
- Bake longer
- Allow complete cooling
- Adjust water slightly
Bread Falls Apart
Possible causes:
- Not enough binding agent
- Poor mixing
Solution:
- Increase psyllium slightly
- Mix ingredients thoroughly
Bread Does Not Rise
Possible causes:
- Old yeast
- Cold environment
Solution:
- Use fresh yeast
- Allow proper resting time
Bread Is Too Dry
Possible causes:
- Too much baking time
- Too little moisture
Solution:
- Reduce baking slightly
- Store properly
Storage Instructions
Room Temperature
Store in an airtight container for up to 2 days.
Refrigerator
Keep refrigerated for up to 5 days.
Freezer
Slice the bread before freezing.
Store in freezer-safe bags for up to 3 months.
Toast slices directly from frozen when needed.
Helpful Tips for Best Results
- Measure ingredients accurately.
- Use psyllium husk for the best texture.
- Do not skip the resting period.
- Avoid adding too much liquid.
- Allow bread to cool completely.
- Use a sharp knife for clean slices.
- Store properly to maintain softness.