There’s something truly special about preparing fresh bread in your own kitchen. The comforting smell that spreads through the house, the crackling golden crust fresh from the oven, and the warm slices served with butter create a timeless experience that many people love. Homemade bread baking has become increasingly popular because it is affordable, satisfying, and surprisingly simple.
This easy artisan bread recipe is designed for both beginner bakers and experienced home cooks. With only a few everyday pantry staples, you can create a loaf that tastes like it came straight from a professional bakery. The texture is soft and fluffy inside while the crust develops a beautiful golden crispness during baking.
Unlike complicated bread recipes that require advanced techniques, expensive tools, or long fermentation times, this version keeps the process straightforward while still delivering delicious results. Whether you want fresh bread for breakfast, sandwiches, soups, or family dinners, this recipe is dependable and beginner-friendly.
Why This Easy Homemade Bread Recipe Is So Popular
Many bread recipes online can feel overwhelming, especially for beginners. Some require bread machines, stand mixers, or specialty flour. This recipe focuses on simplicity while still creating bakery-quality bread at home.
Here’s why home bakers love this rustic bread recipe:
- Uses basic kitchen ingredients
- No bread machine needed
- Beginner-friendly instructions
- Soft, airy interior with crispy crust
- Budget-friendly recipe
- Perfect for sandwiches, toast, or side dishes
- Easily customizable with herbs, seeds, or cheese
The best part is that homemade bread offers freshness and flavor that store-bought loaves often cannot match.
The Secret Behind Perfect Homemade Bread
Good bread depends on understanding how a few simple ingredients work together. Even though this loaf contains only basic ingredients, every component plays an important role in creating the final texture and flavor.
Flour – The Foundation of the Bread
All-purpose flour creates the structure of the loaf. When mixed with water and kneaded, the proteins in flour develop gluten, which helps trap air bubbles inside the dough.
This gluten structure is what gives bread its soft and chewy texture. All-purpose flour works wonderfully for this recipe because it produces bread that is tender while still maintaining enough structure for slicing.
If desired, bread flour may also be used for a slightly chewier texture.
Sugar – Supporting the Yeast
The small amount of sugar in this recipe does not make the bread overly sweet. Instead, it helps activate the yeast and encourages fermentation.
Sugar also contributes to:
- Better browning
- Enhanced flavor
- Improved texture
- Faster rising time
Even a tiny amount makes a noticeable difference in homemade bread.
Salt – Essential for Flavor
Salt is one of the most important ingredients in bread baking. Without it, bread can taste flat and bland.
Salt helps:
- Strengthen gluten structure
- Balance flavor
- Control yeast activity
- Improve texture
Using the correct amount ensures your bread develops both flavor and structure.
Yeast – The Ingredient That Makes Bread Rise
Yeast is a living organism responsible for fermentation. It feeds on sugar and produces carbon dioxide gas, which creates air pockets inside the dough.
This process gives bread:
- A light texture
- Soft interior
- Proper volume
- Delicious aroma
Active dry yeast works perfectly in this recipe, but instant yeast can also be substituted if needed.
Warm Water – Activating the Dough
Warm water brings all ingredients together while activating the yeast.
The ideal water temperature should feel warm but not hot. Water that is too hot may damage the yeast and prevent the dough from rising properly.
Warm water also helps:
- Hydrate the flour
- Develop gluten
- Improve dough texture
Olive Oil – Moisture and Rich Flavor
Olive oil gives the bread softness and adds subtle richness. It helps create a tender crumb while keeping the loaf moist for longer.
Additional benefits include:
- Better texture
- Improved elasticity
- Softer crust
- Enhanced flavor
You can also substitute vegetable oil if necessary, though olive oil adds more depth of flavor.
Sesame Seeds – Optional but Flavorful
Sesame seeds are optional, but they add both visual appeal and a delicate nutty flavor.
Sprinkling sesame seeds on top creates:
- A bakery-style appearance
- Extra crunch
- Rich aroma
- Beautiful presentation
Other topping options include poppy seeds, oats, or mixed herbs.
Understanding Bread Dough Science
Bread baking is both an art and a science. Understanding what happens during mixing and kneading can help improve your baking results.
When flour combines with water, gluten begins forming immediately. Kneading strengthens this gluten network, making the dough elastic and stretchy.
At the same time, yeast fermentation creates gas bubbles. The gluten traps these bubbles inside the dough, causing it to rise.
Without proper kneading and rising time, bread can become dense or heavy.
How to Properly Mix Bread Dough
The dough-making process starts by combining the dry ingredients in a large bowl.
This includes:
- Flour
- Sugar
- Salt
- Yeast
Once mixed, warm water and olive oil are gradually added.
At first, the dough may appear rough or sticky. This is completely normal. Continue mixing until all flour is incorporated and a soft dough begins forming.
Avoid adding too much extra flour during this stage because overly dry dough can result in dense bread.
Kneading – The Most Important Bread-Making Step
Many beginner bakers underestimate the importance of kneading. However, proper kneading is essential for soft and airy homemade bread.
Why Kneading Matters
Kneading helps:
- Develop gluten
- Improve elasticity
- Create better texture
- Support proper rising
- Build bread structure
Without enough kneading, the loaf may turn out heavy or crumbly.
Best Technique for Kneading Dough
Transfer the dough onto a lightly floured surface.
Using the heel of your hand:
- Push the dough forward
- Fold it back toward yourself
- Rotate slightly
- Repeat the process
Continue kneading for about 8–10 minutes.
The dough should become:
- Smooth
- Elastic
- Slightly springy
- Soft but not sticky
If the dough sticks excessively, lightly dust with flour, but avoid adding too much.
The First Rise – Allowing the Dough to Expand
After kneading, the dough requires resting time so the yeast can ferment and produce gas.
Place the dough in a lightly greased bowl and cover it with:
- Plastic wrap
- A kitchen towel
- A lid
Keep the bowl in a warm, draft-free place.
Ideal Rising Conditions
Bread dough rises best in:
- Warm temperatures
- Humid environments
- Draft-free areas
Typically, the dough needs about one hour to double in size.
If your kitchen is cold, the process may take slightly longer.
How to Know When Dough Has Risen Enough
A properly risen dough should roughly double in size.
You can test it by gently pressing a finger into the dough:
- If the indentation slowly springs back, it is ready
- If it immediately bounces back, it needs more time
Allowing enough rise time creates lighter bread with better texture.
Shaping Homemade Bread Like a Bakery Loaf
Once the dough finishes rising, gently press it down to release excess gas.
This process is often called “punching down” the dough, though gentle handling works best.
Shape the dough into:
- A round artisan loaf
- An oval loaf
- A sandwich-style shape
Proper shaping helps the bread bake evenly and improves appearance.
Preparing Bread for Baking
Place the shaped dough onto a greased baking tray or parchment-lined pan.
Before baking, use a sharp knife or bread lame to make shallow cuts across the surface.
Why Scoring the Dough Matters
Scoring helps:
- Control expansion
- Prevent cracking
- Improve appearance
- Release steam during baking
This step gives homemade bread a professional bakery-style finish.
At this stage, you may sprinkle sesame seeds on top if desired.
Baking Bread to Golden Perfection
Preheat the oven to 425°F (220°C).
A fully heated oven is extremely important because it allows the bread to rise properly during the first few minutes of baking.
Bake the bread for approximately 20–25 minutes.
During baking:
- The crust turns golden brown
- Steam develops inside the loaf
- The bread expands
- The aroma becomes irresistible
How to Tell When Bread Is Fully Baked
There are several signs that indicate your bread is done.
Look for These Indicators
- Deep golden crust
- Firm outer texture
- Hollow sound when tapped underneath
- Fully risen loaf
If uncertain, you can use a kitchen thermometer. The internal temperature should reach about 190–200°F.
Cooling Bread Properly
Cooling is often overlooked, but it is essential.
Fresh bread continues cooking internally after leaving the oven. Cutting too soon may create a gummy texture.
Place the loaf on a wire rack and allow it to cool before slicing.
Cooling helps:
- Set the crumb structure
- Improve slicing
- Preserve texture
- Prevent sogginess
Patience greatly improves homemade bread quality.
Helpful Tips for Better Homemade Bread
1. Measure Ingredients Correctly
Too much flour creates dry, dense bread. Spoon flour into measuring cups instead of packing it tightly.
2. Use Fresh Yeast
Old yeast may not activate properly. Always check expiration dates before baking.
3. Avoid Overheating Water
Extremely hot water can kill yeast and prevent rising.
4. Give Dough Enough Time to Rise
Rushing fermentation often results in heavy bread.
5. Don’t Overbake
Excess baking time can dry out the loaf.
Creative Bread Flavor Variations
Once you master the basic bread recipe, you can experiment with additional flavors.
Herb Bread
Mix dried oregano, rosemary, basil, or thyme into the dough.
Garlic Bread Loaf
Add minced garlic or garlic powder for rich flavor.
Cheese Bread
Fold shredded cheddar, mozzarella, or parmesan into the dough.
Whole Wheat Variation
Replace part of the all-purpose flour with whole wheat flour for a heartier loaf.
Seeded Bread
Top with sunflower seeds, flaxseeds, or pumpkin seeds for extra crunch and nutrition.
Best Ways to Serve Homemade Bread
Fresh homemade bread pairs beautifully with many meals and spreads.
Popular serving ideas include:
- Butter and jam
- Honey or peanut butter
- Soup and stew
- Sandwiches
- Olive oil dipping sauce
- Cheese platters
Warm bread fresh from the oven is especially delicious.
Storing Homemade Bread
At Room Temperature
Store bread in an airtight container or bread bag for up to 2 days.
Freezing Instructions
Wrap tightly in plastic wrap and freeze for up to 2 months.
To serve, thaw at room temperature and warm slightly in the oven.
Why Homemade Bread Is Better Than Store-Bought
Many people are returning to homemade baking because it offers advantages beyond flavor.
Homemade bread is:
- More affordable
- Free from preservatives
- Freshly baked
- Customizable
- Satisfying to prepare
It also gives you complete control over ingredients and quality.
Common Homemade Bread Mistakes to Avoid
Even simple bread recipes can go wrong if certain steps are skipped.
Avoid These Errors
- Using expired yeast
- Adding too much flour
- Skipping kneading
- Not allowing enough rise time
- Cutting bread while hot
- Overbaking the loaf
Learning these basics dramatically improves baking success.
Final Thoughts
This simple homemade artisan bread recipe proves that baking delicious bread does not need to be difficult. With a few pantry staples, basic techniques, and some patience, anyone can create soft, flavorful bread at home.
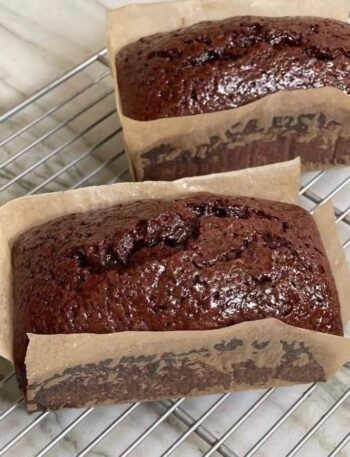
The crisp crust, fluffy interior, and incredible aroma make this recipe a favorite for everyday baking. Whether you are preparing breakfast toast, sandwich bread, or a comforting side for dinner, this loaf delivers reliable and satisfying results every time.
Once you experience the joy of fresh homemade bread, it may quickly become part of your regular kitchen routine.
🍞 Part 2 – Easy Homemade Bread Recipe
Simple Rustic Bread Recipe
Ingredients
- 3 cups all-purpose flour
- 1 teaspoon sugar
- 1 teaspoon salt
- ½ teaspoon active dry yeast
- 1 cup warm water
- 2 tablespoons olive oil
- Sesame seeds for topping (optional)
Instructions
Step 1 – Combine Dry Ingredients
In a large mixing bowl, whisk together the flour, sugar, salt, and yeast.
Step 2 – Add Wet Ingredients
Gradually pour in the warm water and olive oil. Stir until a soft dough begins to form.
Step 3 – Knead the Dough
Transfer the dough to a lightly floured surface and knead for about 10 minutes until smooth and elastic.
Step 4 – First Rise
Place the dough in a lightly greased bowl. Cover and let it rest for 1 hour or until doubled in size.
Step 5 – Shape the Bread
Gently press down the dough and shape it into a round loaf or oval shape. Place onto a greased baking tray.
Step 6 – Score and Add Toppings
Use a sharp knife to make shallow cuts on top. Sprinkle sesame seeds if desired.
Step 7 – Bake
Bake in a preheated oven at 425°F (220°C) for 20–25 minutes or until golden brown.
Step 8 – Cool and Serve
Remove from the oven and let cool before slicing.
Helpful Baking Tips
- Instant yeast can replace active dry yeast
- Avoid overbaking to keep bread soft
- Let bread cool fully before cutting
- Add herbs or cheese for extra flavor
- Store in an airtight container for freshness